Showing posts with label Handy Hubby. Show all posts

12.11.2013

Handmade Desk {Family Room}

Handy Hubby strikes again!  He made a desk!  After he made our great toy storage shelf, I asked if he could make a desk for our kids to keep in our kitchen/family room.  My daughter does a lot of art projects and second grade now requires a lot of homework (WHY?!!).  Most of this ends up on the kitchen table which poses a problem when we need to eat a meal!  Her art table was getting way too small for much of anything besides a pile of junk that never got used.  So we are now moving that table to the basement, and the Christmas tree is currently in its place.  The space is narrow and I found it hard to find a desk that would really fit the space so Handy Hubby made one!

I couldn't resist waiting until after Christmas to show you but here it is...


Check out the dovetail drawers!


For those interested in details, the base is made of poplar, the top is a butcher block top that we purchased at Habitat Restore  for $25 several years ago for another project but never used.  Handy Hubby joined two pieces together to make it deep enough.  He then finished it with an ebony stain (Minwax). I wanted it to blend well with our kitchen.  The drawer pulls are from Home Depot.  


He did an amazing job, didn't he?  Love my Handy Hubby!

8.09.2012

Case of the Dripping Kitchen Ceiling: Solved

An alternative tile for this post would be: Is that a hole in your DuraRock?  Why yes it is!  And the case of the dripping kitchen ceiling (more on that here) is now solved.  It appears that the seat in our beautiful shower was installed incorrectly by a not so expert tile installer.


Today, our contractor and the plumber who installed the plumbing in our addition spent 45 minutes running water in our shower with no luck getting it to drip in the kitchen.  Frustrating for me as I sat there staring at the ceiling and trying to will water to come out. No such luck.  The assessment was that if water was dripping it was a very tiny leak it and it might take several showers to get the water to come out as far as the kitchen ceiling - the plywood would absorb quite a bit before it starts puddling.

Before ripping out the floor of the shower, I suggested ripping out some drywall on the walls outside the shower just to be sure there was no other source.  The next step was to rip out the floor of the shower and replace the pan and hope that was the cause. Thank goodness I suggested this.  

Tonight, while I escaped the house to head to a yoga class (I am a newbie yogi - love it though!), Handy Hubby ripped out some drywall in our upstairs hall which lines up with the back of our shower.  


Once Handy Hubby opened up the hole and ran the shower for a few minutes, he started seeing puddling at the bottom but couldn't figure it out until he cut a little higher to see around the seat.  Bingo.


To give you an idea of what you're looking at, I labeled the picture.


Cutting the Durarock is a BIG no no.  The shower seat is supposed to rest on the tiles below with the tiles above also holding it in place.  Basically, a tile sandwich supported on two of the three sides.  If you want to see how it should be done, check out this You Tube video.  Love the music.

Anyway, if you need more proof that this is a problem, then check out the photo below which I took in the dark hallway but left the lights on in the shower.  Yes, that's light coming through the wall. Where light can get through, so can water. ARGH!!


So, it looks like the area around the seat needs to be ripped out and the tile needs to be replaced and the seat correctly reinstalled after the durarock is properly patched and likely some sort of membrane is attached to be sure water never gets through again.  

We even have a picture of the original Durarock in place thanks to my obsessive picture taking throughout the renovation.  This photo was taken as the Durarock was being installed.  


Let's see how quickly we can get it fixed.  At least it doesn't look like we need to rip out the floor and the walls!


8.02.2012

Thrifty Makeover: Metal & Wood Server

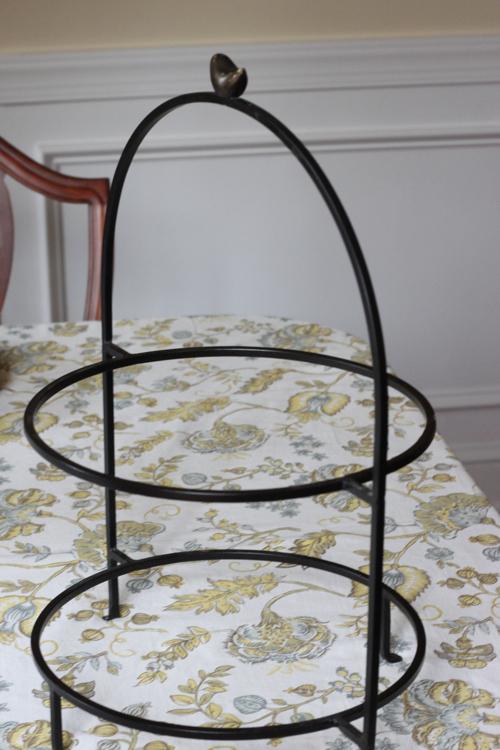
I found this fun two-level server at Goodwill a few weeks ago for $2.95 (yes, Goodwill is expensive around here).  I loved the little bird on the top so I decided to go for it.
I tried it with my formal china to see if I liked the look, and it worked.

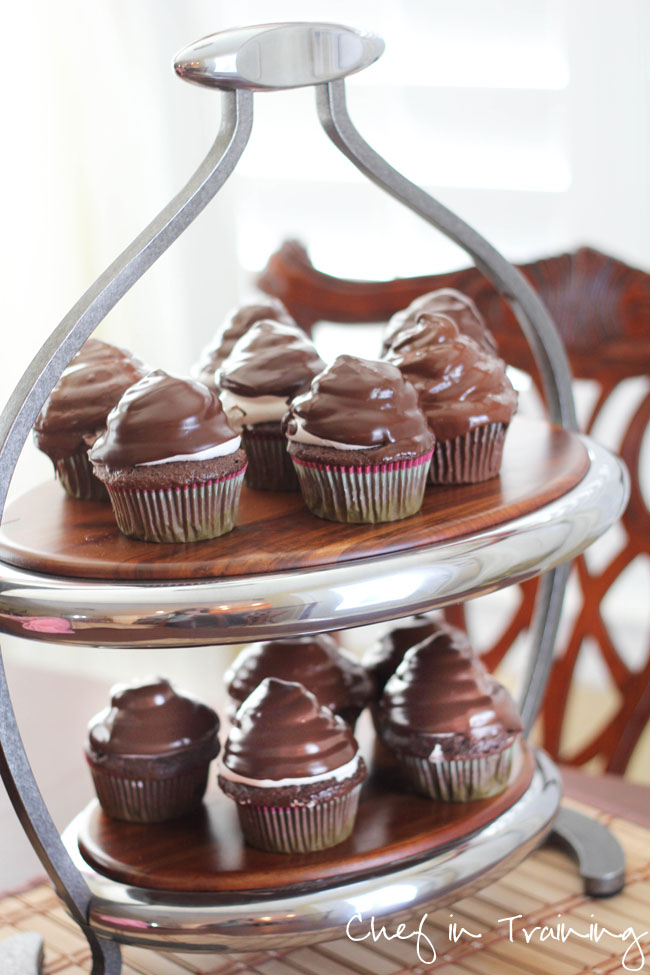
But I had seen this NambĂ© giveaway on one of my favorite food blogs, Chef in Training...

Chef in Training
This gave me an idea for my humble server.  I showed Handy Hubby the picture and a few days later, I had this...
Perfect for cheese and crackers, baked goods, or whatever I need it for.  Casual but still elegant enough for the dining room thanks to the gold bird on top.


He used some wood that he already had hoarded on hand in the basement.  I believe it's maple.  He then applied a few coats of food grade oil meant for butcher blocks.  He also routed the underside so there's a lip which overhangs the metal edge and it's nice and secure if I carry the whole thing from the kitchen to the dining room or porch.
Any thrifty finds for you this week?

Linking to: Southern Hospitality, Between Naps on the Porch
My entry into Nifty Thrifty Tuesday Party is sponsored by Appliances Online and the Best Range Cooker.

7.10.2012

Master Bedroom: Built-in Reveal

It's finally done. Although I have already declared this the worst documented project in the 3 year history of my blog, it was all worth it.  In the end, these projects are not for the blog, but for own enjoyment and use (although Handy Hubby may think differently).

So, without further ado, here it is...


And here's where we started as a reminder.


The styling was not very thoughtful but I grabbed something that I had nearby and that worked with the colors in our master - cream, blue, gray-green.  I'm not going to lie - I did carefully choose which books to put in here based on their color - not their content!

The hardware is from the Martha Stewart line available at Home Depot.

Once again Handy Hubby out did himself. I love the Shaker-style doors that he made.  Also the crisp white paint which matches our trim, makes me less itchy to paint another large piece of furniture in there. Handy Hubby will flip out if I even mention painting more wood so I have to keep those dreams under wraps!!

Hope you had a great 4th of July. I loved having the 4th in the middle of the week - most people were on vacation but we were here.  We were also fortunate to have power when a lot of people in Northern Virginia did not. Thank goodness for small miracles!!

What fun projects are you working on?  Are you taking a break for summer?  I think this is our last large project for a little while but you never know!

Linking to: A Bowl Full of Lemons, Primitive and Proper, Miss Mustard Seed, Savvy Southern Style

3.26.2012

Master Bedroom: Built-ins (yes, I'm addicted)

It's official - no room in our house is safe from built-ins! The master bedroom is no exception. Our television needs a home and this messy corner is the only real option. 

Much like the other built-ins around our house, we'll have a cabinet with doors below and some open shelving above. The TV will go in the open middle and sit a few inches higher than where it does now.   Handy Hubby has already made a good start on it thanks to a rainy, cool weekend.

Why do I love built-ins?  I love that I don't have to hunt down the perfect piece of furniture to fit in the exact right way into the space - custom built-ins always fit perfectly.  I also love that you an maximize the the space in the way that you need it to work - and it can flexible when you need to move shelves, add doors, etc.  Finally, the cost of building them is rarely more than a few hundred dollars, but the value-added to our house is certainly as much.

More porch updates tomorrow hopefully.

Happy Birthday to my Dad!!

3.07.2012

Den: Adding a Door to the Bookshelves

Fortunately 99% of the work involved in transforming our nursery to a den (home office + guest room) was cosmetic.  The one exception was that I wanted to add a door to the lower right shelf. I love open shelving but we had more than enough in this room, and sometimes you just need to store ugly stuff like extra paper, labels, and other office supplies.  Yes, I understand you can buy pretty storage for this stuff but it doesn't always go into those pretty containers the way it should - especially if you have kids!


You can see the shelf at issue in the lower right hand corner of the above picture.  A few hours of work by Handy Hubby and we had this.


I got lucky and found another knob like the others at our local hardware store. Then I need to paint it all white and it will blend in a bit more and seem more seamless and intentional.

Other than the knob (about $2), we had the wood and door left over from our old kitchen. Handy Hubby rounded it over with a router to mimic the drawers.  I'll be sure to share once it's painted out - hopefully by next week!

I have a whole bunch of other tweaks I want to make in this room. Next up is a rug I think. Sofa will have to wait a few more months but I have it picked out I think.

2.02.2012

Den: Small desk details

I have a bunch of small things to share in the office. This may be the last update for a while unless I score a great deal on a rug this weekend!

First Handy Hubby filled in some gaps on the sides of the shelves which were really irking me. They were probably irking me when we built the shelves circa 2003-2004, but we forgot about it soon after!

Now he has filled in the gaps on the left and right side. I still need to touch up the paint but it definitely looks loads better. I still would like to add a door to the bottom right cabinet so we can store extra printer paper and other unsightly office gear.


Note to self: Do something about that random phone cable on the floor in the top picture. At a minimum, just reattach it to the wall inside the bottom bookshelf!

Finally, I added some cute details to the desk top. First, a vintage desk lamp purchased at a yard sale for $5 last summer.  I thought about spray painting it but now I love the gray in this room, so it will stay as is.


I also wanted pens and scissors to be easy to grab.  I picked up a clear plastic cup on clearance at Target for about $1.50. These are so cute and the teal color works well with the bookshelves. I have wanted a tape dispenser for a while and now I have one - sad but true. It's the first time I've had a real desk in 6 years, so give me a break!  No more digging around for tape to wrap gifts.

Let me know if you see any great deals on gray rugs! The room feels cold and loud without a rug so I am itching to find one. Still looking for a permanent chair. The acrylic chair is taking up residence right now, but that will return to the basement when my parents visit next.

Have a great weekend! What are you making for the Super Bowl? We're heading to our friends Amie and Brian's Cheesebowl. It's a blast but not good for the thighs! No idea what I'm bringing yet but it has to be cheese-based. Ideas welcome!!

1.17.2012

Alex's Big Boy Room Reveal!

And finally, we're done with Alex's room...at least for now!  There are still some things I want to do and furniture I want to paint but the room is done and totally functional. I love it.


It's such a sunny and pleasant room for my sweet little guy to grow up in.  I find myself intentionally walking by the room to peek in and see how nice it looks. It's even better than I ever imagined. He absolutely loves playing in there which he rarely ever did before in his nursery.  I attribute most of this to the sunshine and just general pleasantness of this room.

The good news is that we spent only a minimal amount of money on furniture for him, so most of the investment in this room was the closet.  First, the bed was a hand-me-down from my grandparents via my parents. It was used as a guest room bed in both of their houses so it was pretty rarely ever used. It has a twin which is currently residing in my attic but we could use it down the road if Alex wants a second bed for sleepovers, etc.  Right now he enjoys the floor space for playing!

The dresser was the same one from his nursery. It still needs some work which will happen eventually but I'm not in a rush. I purchased it on Craigslist for $75 a few years ago. The top was unfinished when we bought so we finished that to match the rest but handles really need an update!  The nightstand was purchased from Goodwill for $15. That also needs work which might happen before the dresser!


The white cabinet at the foot of his bed was from my grandparents as well. It had legs at one point but they are long gone (and ugly according to my mom!).  It might get a coat of paint at some point. The bookshelf was also from my grandparents' house. It's really narrow and not very deep so fit perfectly in that space.


The red leather chair was my grandfather's favorite chair.  Whenever I sit in it, I think about him and how much he would have loved being with our kids.


Finally, the rug is from Land of Nod, and I absolutely love it.


It was the only major purchase but I was able to get free shipping so it was about $279 for the 5x8. Not cheap but it's a great quality rug. I almost purchased this rug from Pottery Barn Kids but in the end decided I wanted something more fun and that didn't shed like the PBK rug supposedly does (thank goodness for reviews).  This was without a doubt the right choice. The Land of Nod rug has a great pale gray-blue edge and background which coordinates really nicely with the wall color.  I never expected that one of my favorite parts of the room would be the rug! Of course it was the final piece of the puzzle.

Of course I think the board and batten molding is one of my favorite parts.  Handy Hubby did a great job implementing my vision as always!

Let's look at another before and after because I cannot resist...

As our guest room in 2011...

Our guest room in 2007...

Previous owner's guest room in 2002...

And now today...

You've come a long way, little room!

I'll be back tomorrow with a source list for the smaller stuff.  Let me know if there's anything you would like to know more about!

Linking to Evolution of Style, Funky Junk Interiors, Remodelaholic, At The Picket Fence, Tatertots & Jello, Thrifty Decor Chick, Shabby Nest, A Bowl Full of Lemons, My Uncommon Slice of Suburbia, Evolution of Style

1.11.2012

Alex's Room: New Light

The light in Alex's new room was completely fine and I actually really still like it but it wasn't going to work in his room. It was slightly feminine, and I found a new home for it (of course). More on that later.


Handy Hubby worked some electrical magic and took down the old one and put in the new one.

Here's the after. The light is actually an exterior light from Seagull Lighting. It's a great fixture but I wish it was a tiny bit larger. I can definitely live with it though because I love the style. 

I still cannot believe this was our dowdy underused guest room!  More to come!!

1.09.2012

Old To Do Lists

I found this old list in the back of a drawer in our family room. We made this list when we moved back into the house, or just before we moved in, after renovating in 2008.


'

You can see how we prioritized a few things (those with numbers on the left side), and we even finished a few things before putting the list in the drawer. 2 years later, there are only 2 unfinished projects - the rain barrel and the enclosures around the A/C units. I have good reasons for both. I have not found the perfect spot for a rain barrel yet. I have some ideas but nothing has jumped out as the perfect option. We haven't enclosed the A/C units because I am not happy with the newer unit we have. It's really loud and I have debated replacing it so that we aren't interrupted eating dinner on the porch. I wish I had paid closer attention to the HVAC decisions I made during the renovation but I think this fell through the cracks around the time I gave birth to Alex which took me out of the work zone for four or five days.  It can be fixed but it's going to cost some $$$. I'm going to decide this spring whether I can live with it or not and then finish the enclosure project. 

Still, I think Handy Hubby did a fantastic job knocking off all of these projects. Most were completed within a year which I think is great!!

I love finding notes like this which really take me back in time and remind me what we were thinking about at that point and what our priorities were.

Happy Monday (not).


1.05.2012

Our DIY Stove Hood

I've received a lot of questions about our stove hood in the past few years so I thought I should recap how we came to have this beauty.  It's completely awesome.  And it's also a DIY project.  Unfortunately, we did this before I started writing the blog so I didn't take very many step by step pictures (or really any), so you'll get a brief explanation and no pictures. 


When we were planning our kitchen, every kitchen I loved had a built-in stove hood. I love the stainless look but I have never loved big stainless stove hoods in modestly sized kitchens. I really prefer the wood look which coordinates with the cabinets although I don't think matching exactly is necessarily. Of course when I priced out the built-in options they were generally well over $1000 (not including the venting insert) and none of them fit our needs exactly, so we decided to build it. Well, Handy Hubby would build it and I would occasionally hold pieces and provide moral support!

We started with a Fujioh stove hood insert (around $250). We chose it because of it's good ratings, strong air pull, and it is relatively quiet on the low setting.  The hood came with some specs on how far it should be from the stove (at least 24") and some other specs for installation. 

I drew a quick sketch of the design I wanted and Handy Hubby went to work. The base part where the fan inserts, was relatively easy - basic a high grade plywood box.  The same thing for the top piece below the ceiling. The challenge came with the angles on the top. There was a lot of trial and error and maybe a little cursing until the angles were just right.


Our contractor who built our addition came and helped out with the installation including punching the hole through the outside wall for the vent. It was painted using color-matched semi-gloss paint from Benjamin Moore.  The final result is pretty fantastic we think! 

1.03.2012

Alex's Room Progress

Happy New Year!  I feel like I am finally getting a handle on the various messes in our house. The combination of multiple projects and Christmas chaos was almost more than I could handle.

We've made a lot of progress in Alex's room over the past few weeks. I am so happy with how it's coming out! (For more about why we're making this change, read this post.)

Project #1 was installing the board and batten molding on the bottom half of the room.

Here's the blank slate we're working with. It's our former guest room and I never loved the color. Very blah.

Paint: SW Grassland
First Handy Hubby installed 1x4 pre-primed pine as the top rail.


Next Handy Hubby ripped out the top piece of our baseboard. Our baseboard is made of 2 separate pieces - a piece of flat stock and then a piece of curved molding on the top. Handy Hubby removed the top piece so we were left with the simple flat bottom piece. We chose to do this so the upright rails would not butt into the bottom piece oddly.

Of course ripping out a piece of 70 year old molding created a bit of a mess which required several coats of mud and patching. The large hole above was patched using a short piece of molding which squared off the corner.  Handy Hubby did a couple of coats of spackle and sanding which delayed things for a few days.

Next he planned out the rails by centering a rail in the only uninterrupted wall (the other 3 walls have windows and the door and closet).  He then measured 12" between each piece all the way around the room.


Next Handy Hubby started installing the vertical pieces. Of course, nothing in our 70 year old house is level or even so each piece had to be separately cut to size.


Here they are "dry-fitted" before nailing them (and before patching the walls below). He highly recommends this method in case you have to tweak the placement.

Next up, lots and lots of caulking!