Before we talk about rotting veggies, I have to wish my beautiful
little girl a happy 5th birthday! Time flies but I enjoy each age even more than the next so there is always something to look forward to (except maybe the teen years!).
Back to the regularly scheduled programming...
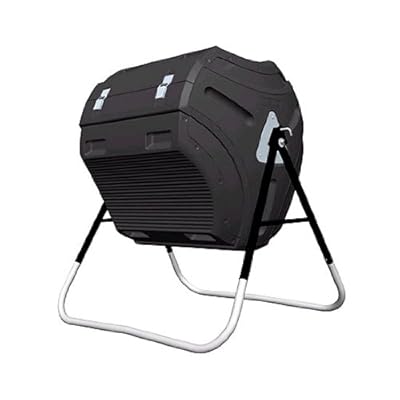
As I blogged about yesterday, we're getting our compostin' on. In case you are thinking about composting, I wanted to share a little bit of the stuff that I have come up with in my composting research. Yesterday, I posted about our
new compost tumbler
so today I thought I would give you an idea of what we plan to compost and not compost. We also plan to involve the kids as much as possible, so we'll let you know how that goes. I have a feeling they are going to be itching to give their unwanted veggies back to the garden!
First, here are some of the sites that I used to come up with these answers. These sites are FILLED with info so definitely check them out if you need more info.
VegWeb
Mike McGrath
eartheasy
EPA
Planet Green
Q: Why compost?
Composting takes stuff you would throw away and turns it into a great soil supplement for your garden, plants, or shrubs. This minimizes waste that goes into landfills and incinerators. Compost is better for the environment than chemical fertilizers.
Q: What can we compost?
An amazing amount of stuff! Everything from strawberry tops to dryer lint! Here's a list of what we plan to try composting:
- fruit and vegetable scraps
- coffee grounds
- grass clippings
- leaves (ground up in our leaf vacuum)
- flowers and cuttings
- crushed eggshells
- dryer lint
- shrub prunings
- saw dust (hubby is happy!)
If you have a giant compost pile, check out these ideas. Condoms? Really?
Q:
What should we not compost?
Although most things are technically compostable, there are a lot of things that won't compost quickly or they will stink and therefore attract rodents. Yuck. So, these are the things that we will not be composting (among lots of others I'm sure).
Q: What's a good mix of compost?
It's important to balance between nitrogen and carbon compost. Carbon-rich material (ground leaves, sawdust, eggshells) keeps the compost lighter. Nitrogen-rich material (grass clippings, fruit and veggie scraps, shrub clippings) help make the enzymes necessary to break-down the compost. Here's a great list from eartheasy which delineates between the carbon and nitrogen. Most sites recommend getting a compost accelerator which can be purchased at garden supply stores.
Q: Does it smell?
It should not smell rotten or gross, but earthy. We'll have to let you know as we continue along in this process!
Q: Where should you put the compost bin?
I have heard a mix of advice between sun and shady locations. Some sun seems to be required to help create the heat necessary for break-down. For now, we are putting our tumbler near our trash cans for convenience which get some afternoon sun but not full day sun.
Q: How long until the compost is ready to be used?
I've heard a range of answers which probably depend on what you are composting. It seems like 8-11 weeks is a safe bet. When our compost tumbler gets fairly full, we'll probably move the compost to a smaller plastic storage bin with a tight-fitting lid so it can "finish" in there. We can store a few of those discretely next to our garage until we are ready to use them.
Q: What do you do with the compost once it's ready?
The compost can be added to soil around plants and shrubs. You can add it to veggie gardens but it seems that this should only be done after harvest because the compost should sit for several weeks before planting.
I hope you found this little summary helpful! I'm sure there will be loads of other questions as we go along so I'll work on keeping this list updated as I have more questions and find the answers!
* * * * * * * *
House Tour Link Party starts MONDAY with LIVING AND FAMILY ROOMS! Full schedule and details right here tomorrow!