6.22.2010

DIY Headboard: Part II (The BIG Reveal!)

Yesterday, I did the first post about our DIY upholstered headboard.  Today's post is the finale and the big reveal!


After covering the buttons, I placed each button on the headboard in the approximate location where I wanted it to go - 3 across the top and 4 on the bottom.  I marked each location, then using some heavy duty twine and a needlepoint needle (with a large eye for the string) I poked through the peg board holes in the back through the foam and fabric on the front.  I then strung the button onto the string and poked the needle back through another hole in the peg board.  While Jim pushed on the button in the front, I pulled both strings in the back and tied them off very tightly.  We did each of the seven buttons in the exactly the same way and tied off each tightly.  The result is a sophisticated tufted headboard!


We hung it on the wall tonight using a simple cleat system - one piece of MDF (about 25" long) flat on the back of the headboard with a 45 degree angle across the edge.  We hung another piece of MDF on the wall with the opposing 45 degree angle, then slipped the headboard over the wall cleat.  The headboard is heavy enough not to slip off, but if we feel we need more stability, we can put a few screws in through the bottom frame of the headboard behind the bed.

And now, the room before the headboard...

And here's the after...


Even Jim had to admit that it looked really good.  I'm sure this won't be my last upholstered headboard.  I have some long term plans for our master bedroom...

6.21.2010

FREEography: Britt Neal CD Giveaway!

As your summer parties get into full swing, get some new soulful tunes from one of my favorite artists, Britt Neal, to get you through any party - whether it's a big 4th of July BBQ, neighborhood block party, or quiet evening on the screen porch with good friends.  If you are in Virginia or North Carolina, check her out in concert this summer during her Red, Blonde and Blues Summer Tour with the Kirsten Thien Band. We're looking forward to checking out the show at St. Elmo's on July 7th!  Click here for the full schedule.


This week's FREE GIVEAWAY is two fantastic Britt Neal CDs.  That's right - 2 winners!  

P.S.  If you just cannot wait, you can download her stuff on iTunes and lots of other places right now

Rules, Rules, Rules

TO ENTER, submit a comment below and type "BRITT ME!"  For fun, you can also tell us about your 4th of July or other summer BBQ plans!  Be sure you sign in before leaving the comment or leave your email address in your comment so we can contact you if, and only if, you win.

The contest ends on Monday, June 28th at 11:59 p.m. ET.  One entry per email address.  The winner will be chosen randomly using random.org.  Must be a US resident at least 18 years of age with a mailing address in the lower 48 states.  Winner will be announced on Tuesday, June 29th.  Good luck!

DIY Headboard: Part I

This is my 50th blog post on HOUSEography!  I hope I am as excited about the 100th and 200th posts as I am about the 50th!  Back to business.

I have been wanting to make an upholstered headboard for a ridiculously long time.  I love the luxurious and cozy look they give a bedroom, but until now I didn't have the right spot.  Our basement guest room seemed liked the perfect spot to try one out.  It's a small room so a real bed frame was not going to work since there is barely enough room for the mattress.   Also, the area under the uncentered window makes wall decor challenging.


So, we decided to DIY an upholstered headboard, and I got some additional inspiration from my friends over at Young House Love.   This entire project cost me less than $45!

We started with a piece of peg board that we had leftover from a pre-addition furnace surround.  We did a standard 54" wide for a full size bed and I went with a slightly higher 36" tall.  

For stability and depth, Jim took some scrap pieces of 3/4" MDF and nailed them around the edges.  For interest, we cut the corners on the diagonal (6" x 6").


I then took some basic green foam from JoAnn Fabrics, and some white quilt batting (crib blanket size), and stapled each to the headboard around the edges (mostly just to keep it from slipping while I worked the fabric on).


Next, I chose a chocolate brown fabric which I found on the sale remnant table at G Street Fabrics.  I thought the dark brown would stand out nicely against the light mocha colored walls and pick up the deep tones in the bedspread.  After a quick ironing, I placed it over the padding and flipped it over.  Starting at the center of the top, then center of the bottom, then each side, I stapled the fabric on the back with a staple gun
I then worked around the head board, pulling the fabric so it was taught and stapling about every inch to inch and a half around the outside.
For an extra luxurious and custom look, I wanted to add buttons to make the headboard appear tufted.  I made covered buttons using a readily available covered button kit (about $4 for 3 buttons).

The buttons were surprisingly easy to make.  I snapped together 7 of them in about 20 minutes with  fabric scraps that match the headboard using the pattern on the back of the button package.  
Check back tomorrow to see the final steps and the finished product!

Click here to see the big reveal.

6.19.2010

Kitchen Backsplash Shopping

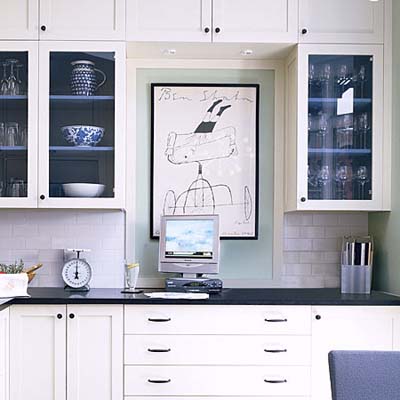
Almost a year after our kitchen was installed, I am finally getting up the nerve to pick out a backsplash.  I'm not sure why it has taken me so long or why it seems so daunting, but I know it's absolutely necessary to give our kitchen a finished feeling.  When we had the counters installed, we decided not to use a matching granite backsplash because we knew the tile would eventually come.


I am leaning heavily towards white subway tile with some sort of crackle or antique finish.  I really want the backsplash to blend with the cabinets and counters and not make it's own separate statement.  We paid plenty for the cabinets and counters - they should be the showpieces in our kitchen.  I am still struggling over what to do behind the stove.  It's a focal point from our family room so I want it to be interesting but I don't necessarily want it to be distracting in the room.  I am thinking about doing a pattern in the same white as the rest of the tile, but I haven't decided on a pattern to use.

Here are some of my inspirational pictures, as well as links to great back splash galleries in case you are looking for some ideas as well.

This Old House

Image via This Old House
Garden Web Finished Backsplash Blog
I love the detail over the stove in this one.
Image via NDVWEB

HGTV

Image via HGTV

I welcome your opinions on what we should do and please send pictures if you have any!

6.18.2010

House Plants: It's Not Easy Being Green (in my house)

House plants and trees can add a fresh and natural look to pretty much any home, but when it comes to growing things in my house, I did not get the green thumb gene.  My gardens outside do okay (at least until August when I get bored and everything shrivels), but anything real and green inside is doomed.  There are two exceptions:  1) an orchid in my master bathroom which seems to thrive on neglect and steamy showers; and 2) a plant given to me by my aunt which is in a too small pot and only gets watered about once per month.  I'm slightly afraid of putting it in a larger pot for fear it will take over the living room.  Here's a picture of it (anyone know what it's called?):


I am considering putting something small and green on my family room mantle.  I even have the pot ready for it but I just haven't brought myself to buy the plant for fear of its fate.  I plan to buy one soon so I'll let you know the result (and when to mourn its loss).


I have mixed feelings about fake flowers.  I like them on wreaths and maybe some fake cut flowers in rooms where we don't spend much time (like a guest room), but I don't like to look at them all the time - probably because of the dust.  I adore cut flowers and often have some in bright hues on my kitchen island (as you can see in most of the pictures).

Take this poll and see how others feel about interior green.


I also welcome suggestions for small and sturdy house plant varieties!