
We've made a lot of progress in Alex's room over the past few weeks. I am so happy with how it's coming out! (For more about why we're making this change, read this post.)
Project #1 was installing the board and batten molding on the bottom half of the room.
Here's the blank slate we're working with. It's our former guest room and I never loved the color. Very blah.
 |
| Paint: SW Grassland |
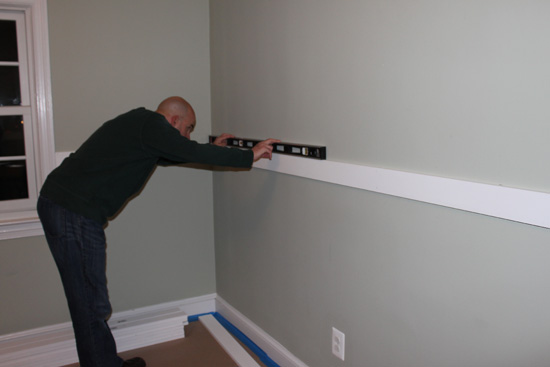
Next Handy Hubby ripped out the top piece of our baseboard. Our baseboard is made of 2 separate pieces - a piece of flat stock and then a piece of curved molding on the top. Handy Hubby removed the top piece so we were left with the simple flat bottom piece. We chose to do this so the upright rails would not butt into the bottom piece oddly.

Of course ripping out a piece of 70 year old molding created a bit of a mess which required several coats of mud and patching. The large hole above was patched using a short piece of molding which squared off the corner. Handy Hubby did a couple of coats of spackle and sanding which delayed things for a few days.
Next he planned out the rails by centering a rail in the only uninterrupted wall (the other 3 walls have windows and the door and closet). He then measured 12" between each piece all the way around the room.

Next Handy Hubby started installing the vertical pieces. Of course, nothing in our 70 year old house is level or even so each piece had to be separately cut to size.

Here they are "dry-fitted" before nailing them (and before patching the walls below). He highly recommends this method in case you have to tweak the placement.

Next up, lots and lots of caulking!
